There is a reason ramen shops in Japan draw long lines of devoted customers every single day: a properly made bowl of ramen is one of the most deeply satisfying culinary experiences on earth. The interplay of a rich, hours-long broth, springy alkaline noodles, tender braised pork, a perfectly jammy egg, and carefully chosen toppings creates a dish that is far greater than the sum of its parts. Making Japanese ramen from scratch at home is a project, but it is an immensely rewarding one that puts you in complete control of every element.
This guide walks you through every component of authentic ramen: the broth (including both tonkotsu and shoyu variations), handmade alkaline noodles, chashu pork belly, marinated soft-boiled eggs, tare seasoning, aromatic oil, and an array of toppings. The process spans two days of mostly hands-off cooking time, and the result will rival your favorite ramen shop. Let us get started.
Understanding Ramen: The Five Essential Components
Before diving into recipes, it helps to understand the architecture of a ramen bowl. Every great bowl consists of five distinct elements that must work in harmony.
Broth (soup base) provides the body and backbone. It can be rich and opaque (paitan) or clear (chintan), made from pork bones, chicken, seafood, or vegetables. Tare (seasoning concentrate) is a highly concentrated sauce added to the bowl before the broth, providing the primary salty-savory flavor. The three main types are shoyu (soy sauce-based), shio (salt-based), and miso. Aromatic oil floats on the surface and adds fragrance and richness; common options include chicken fat, pork lard, mayu (black garlic oil), or chili oil. Noodles are specifically crafted for ramen using alkaline water (kansui), which gives them their distinctive yellow color, springy texture, and slightly slippery surface that interacts perfectly with broth. Toppings provide contrast in flavor, texture, and visual appeal: chashu pork, ajitsuke tamago (seasoned egg), nori, scallions, menma (fermented bamboo shoots), and more.
Tonkotsu Broth: The Rich, Creamy Foundation
Tonkotsu broth is made by boiling pork bones at a vigorous, sustained rolling boil for 12 to 18 hours. This aggressive cooking action breaks down collagen into gelatin and emulsifies fat into the broth, creating that signature creamy, opaque, ivory-colored liquid that coats the back of a spoon. It is the most time-intensive component but requires minimal active effort.
Tonkotsu Broth Ingredients
- 2 kg pork leg bones (femur bones, cut into 8 cm pieces by your butcher)
- 1 kg pork neck bones or spine
- 2 pig trotters, split lengthwise
- 1 large onion, halved
- 1 head of garlic, halved crosswise
- 5 cm piece of fresh ginger, sliced
- 1 large leek (green part only), roughly chopped
- Water to cover (approximately 6 liters)
Tonkotsu Broth Method
- Soak and clean the bones. Place all pork bones and trotters in a large stockpot and cover with cold water. Soak for 2 to 4 hours (or overnight in the refrigerator), changing the water once. This draws out blood and impurities, resulting in a cleaner-tasting broth.
- Blanch. Drain the soaking water and cover the bones with fresh cold water. Bring to a boil over high heat and cook for 15 minutes. Drain, discard the water, and rinse each bone under running water, scrubbing off any remaining scum or dark residue. This step is essential for a clean, non-funky tonkotsu.
- Begin the long boil. Return the cleaned bones to a scrubbed-out pot. Add approximately 6 liters of fresh water to cover the bones by about 5 centimeters. Bring to a vigorous rolling boil over high heat. Once boiling hard, reduce the heat to maintain a strong, sustained boil (not a simmer). You want constant, vigorous bubbling to emulsify the fat and break down the collagen.
- Cook for 12 to 18 hours. Maintain the boil, adding hot water from a kettle as needed to keep the bones submerged. After 6 hours, add the onion, garlic, ginger, and leek greens. Continue boiling. The broth will gradually turn from translucent to cloudy to fully opaque and creamy white. Stir occasionally and scrape the bottom to prevent sticking.
- Strain and store. After 12 to 18 hours, the broth should be thick, creamy, and richly flavored. Strain through a fine-mesh strainer, pressing on the solids to extract every drop of gelatin. Discard the bones and aromatics. You should have approximately 3 to 4 liters of finished broth. It will set into a firm jelly when refrigerated, which is a sign of excellent gelatin extraction. The broth keeps for 5 days refrigerated or 3 months frozen.
Shoyu Tare: The Seasoning Concentrate
Tare is the seasoning base that gives your ramen its defining flavor character. For shoyu (soy sauce) ramen, this concentrate blends multiple sources of glutamate-rich savoriness. You add about 35 to 45 milliliters of tare to each bowl before ladling in the hot broth.
Shoyu Tare Ingredients
- 200 ml naturally brewed soy sauce (Japanese koikuchi)
- 50 ml mirin
- 50 ml sake
- 1 piece kombu (10 cm square)
- 15 g dried shiitake mushrooms
- 10 g katsuobushi (bonito flakes)
- 1 tablespoon brown sugar
Shoyu Tare Method
- Combine the soy sauce, mirin, sake, kombu, and dried shiitakes in a saucepan. Let it steep at room temperature for at least 4 hours, or overnight in the refrigerator.
- Place the saucepan over medium-low heat and bring to a bare simmer (do not boil). Remove the kombu just before the liquid boils. Add the brown sugar and stir to dissolve.
- Add the katsuobushi, turn off the heat, and let steep for 10 minutes. Strain through a fine-mesh sieve lined with cheesecloth. Store the finished tare in a jar in the refrigerator for up to one month.
This tare recipe combines three layers of umami: soy sauce (glutamate), shiitake (guanylate), and bonito (inosinate), creating the synergistic multiplication effect that gives great ramen its addictive depth. For a deeper exploration of how these flavor compounds interact, see our article on the secret ingredients that make sauces irresistible.
Handmade Ramen Noodles with Alkaline Water
Ramen noodles get their distinctive chew, bounce, and yellow hue from kansui, an alkaline mineral water solution. You can buy food-grade kansui online, or create a substitute by baking baking soda in your oven (heating sodium bicarbonate converts it to sodium carbonate, which has a higher pH). According to Serious Eats, this baked soda technique produces noodles virtually indistinguishable from those made with traditional kansui.
Noodle Ingredients (serves 4)
- 300 g bread flour (high protein content, 12-14%)
- 100 g all-purpose flour
- 6 g baked baking soda (sodium carbonate) or 8 ml liquid kansui
- 4 g fine sea salt
- 160-170 ml cold water
- Cornstarch or potato starch for dusting
Noodle Method
- Prepare baked baking soda (if using). Spread 60 grams of baking soda on a foil-lined baking sheet. Bake at 120 degrees Celsius (250 degrees Fahrenheit) for 1 hour. The powder will lose about one-third of its weight. Store the remainder in an airtight container. Weigh out 6 grams for this recipe.
- Mix the dough. Dissolve the baked soda and salt in the cold water, stirring until fully dissolved. Combine the flours in a large bowl. Add the alkaline water gradually, mixing with chopsticks or a fork until shaggy clumps form. The dough will feel dry and crumbly at first; this is normal.
- Knead and rest. Turn the dough out and press it together firmly. Knead by hand for 10 minutes, or use a stand mixer with a dough hook for 8 minutes on low speed. The dough should be firm, smooth, and slightly tacky but not sticky. Wrap tightly in plastic wrap and rest at room temperature for 30 minutes minimum (up to 2 hours for easier rolling).
- Roll and cut. Divide the dough into 4 portions. Using a pasta machine, roll each portion progressively thinner, starting at the widest setting and working down to approximately 1.5 mm thickness (typically setting 5 or 6 on most machines). Dust generously with starch between passes. Cut the sheets using the narrow cutting attachment for thin, straight noodles. Toss the cut noodles with more starch to prevent sticking and portion into nests of approximately 130 grams each.
- Cook the noodles. Bring a large pot of unsalted water to a vigorous boil. Cook each portion for 60 to 90 seconds (fresh noodles cook fast). Drain well and add directly to the assembled bowl.
Chashu Pork Belly: Melt-in-Your-Mouth Perfection
Chashu is the crown jewel topping of most ramen bowls. This braised, rolled pork belly becomes impossibly tender and richly flavored after a long, slow cook in a soy-mirin braising liquid.
Chashu Ingredients
- 1 kg skin-on pork belly, in one piece
- 200 ml soy sauce
- 200 ml mirin
- 100 ml sake
- 100 ml water
- 50 g granulated sugar
- 4 garlic cloves, smashed
- 3 cm piece of ginger, sliced
- 2 scallion whites
Chashu Method
- Roll the pork belly tightly into a cylinder with the skin on the outside. Tie securely with butcher’s twine at 2 cm intervals.
- Sear the rolled pork in a hot, dry pan or Dutch oven until golden brown on all sides, about 8 minutes total.
- Combine the soy sauce, mirin, sake, water, sugar, garlic, ginger, and scallions in the pot. Bring to a simmer, then add the seared pork roll. The liquid should come about halfway up the meat. Place a drop lid (otoshibuta) or a circle of parchment paper directly on the surface.
- Braise at a very low simmer (or in a 140-degree-Celsius oven) for 2.5 to 3 hours, turning the pork every 45 minutes. The chashu is done when a chopstick slides through the center with no resistance.
- Let the pork cool in its braising liquid. Refrigerate overnight for the best slicing texture. Save the braising liquid; it becomes your egg marinade and can also supplement your tare. Slice the chilled chashu into rounds approximately 5 mm thick and sear briefly in a hot pan or with a kitchen torch before serving.
Ajitsuke Tamago: Marinated Soft-Boiled Ramen Eggs
A properly made ramen egg has a fully set white and a gloriously jammy, almost custard-like yolk in deep amber-orange. The marinade penetrates the egg over 12 to 24 hours, adding color, sweetness, and umami.
Egg Method
- Bring a pot of water to a full rolling boil. Gently lower 6 large eggs (straight from the refrigerator) into the water using a slotted spoon.
- Cook for exactly 6 minutes and 30 seconds for a jammy yolk (adjust by 15 seconds if your eggs are at room temperature).
- Transfer immediately to an ice bath for at least 10 minutes. Peel carefully under gently running water.
- Place the peeled eggs in a zip-lock bag with the reserved chashu braising liquid (diluted 1:1 with water if very salty). Press out the air, seal, and refrigerate for 12 to 24 hours, turning the bag occasionally for even coloring.
- Halve the eggs lengthwise just before serving. The exterior should be a rich caramel-brown, and the yolk should be deeply jammy and vibrant orange.
Aromatic Oil and Final Toppings
Mayu (Black Garlic Oil)
Mayu adds a distinctive smoky, slightly bitter complexity that balances the richness of tonkotsu broth. Heat 120 ml of sesame oil in a small saucepan over medium-low heat. Add 8 thinly sliced garlic cloves and cook, stirring frequently, until the garlic turns jet black (about 10 to 12 minutes; watch carefully as it goes from dark brown to black quickly). Transfer the oil and garlic to a blender or use an immersion blender to puree until smooth. Strain if desired. Drizzle 1 to 2 teaspoons on each assembled bowl.
Essential Toppings Checklist
| Topping | Preparation | Purpose in the Bowl | Amount per Serving |
|---|---|---|---|
| Chashu pork | Sliced, seared | Rich protein, umami | 3-4 slices |
| Ajitsuke tamago | Halved | Creamy richness | 1 egg (2 halves) |
| Scallions | Thinly sliced | Freshness, sharpness | 2 tablespoons |
| Nori | Halved sheets | Sea flavor, texture | 1-2 half sheets |
| Menma | Store-bought or homemade | Crunch, fermented funk | 2 tablespoons |
| Corn kernels | Butter-sauteed | Sweetness, color | 2 tablespoons |
| Bean sprouts | Blanched 30 seconds | Crunch, freshness | Handful |
| Sesame seeds | Toasted | Nutty aroma | 1 teaspoon |
Assembling the Perfect Bowl
Assembly order matters in ramen. Each component is placed deliberately so that the first bite delivers the full experience.
- Heat your bowls. Fill large ramen bowls with boiling water and let them sit for 2 minutes, then discard the water. A hot bowl keeps the broth at the right temperature throughout the meal.
- Add tare. Place 40 ml of shoyu tare in the bottom of each warmed bowl.
- Add aromatic oil. Drizzle 1 to 2 teaspoons of mayu or your chosen aromatic oil over the tare.
- Ladle in the broth. Add 350 to 400 ml of piping hot tonkotsu broth. Stir gently to dissolve the tare into the broth.
- Add noodles. Drain the freshly cooked noodles well and place them in the center of the bowl. Use chopsticks to gently fold and arrange them.
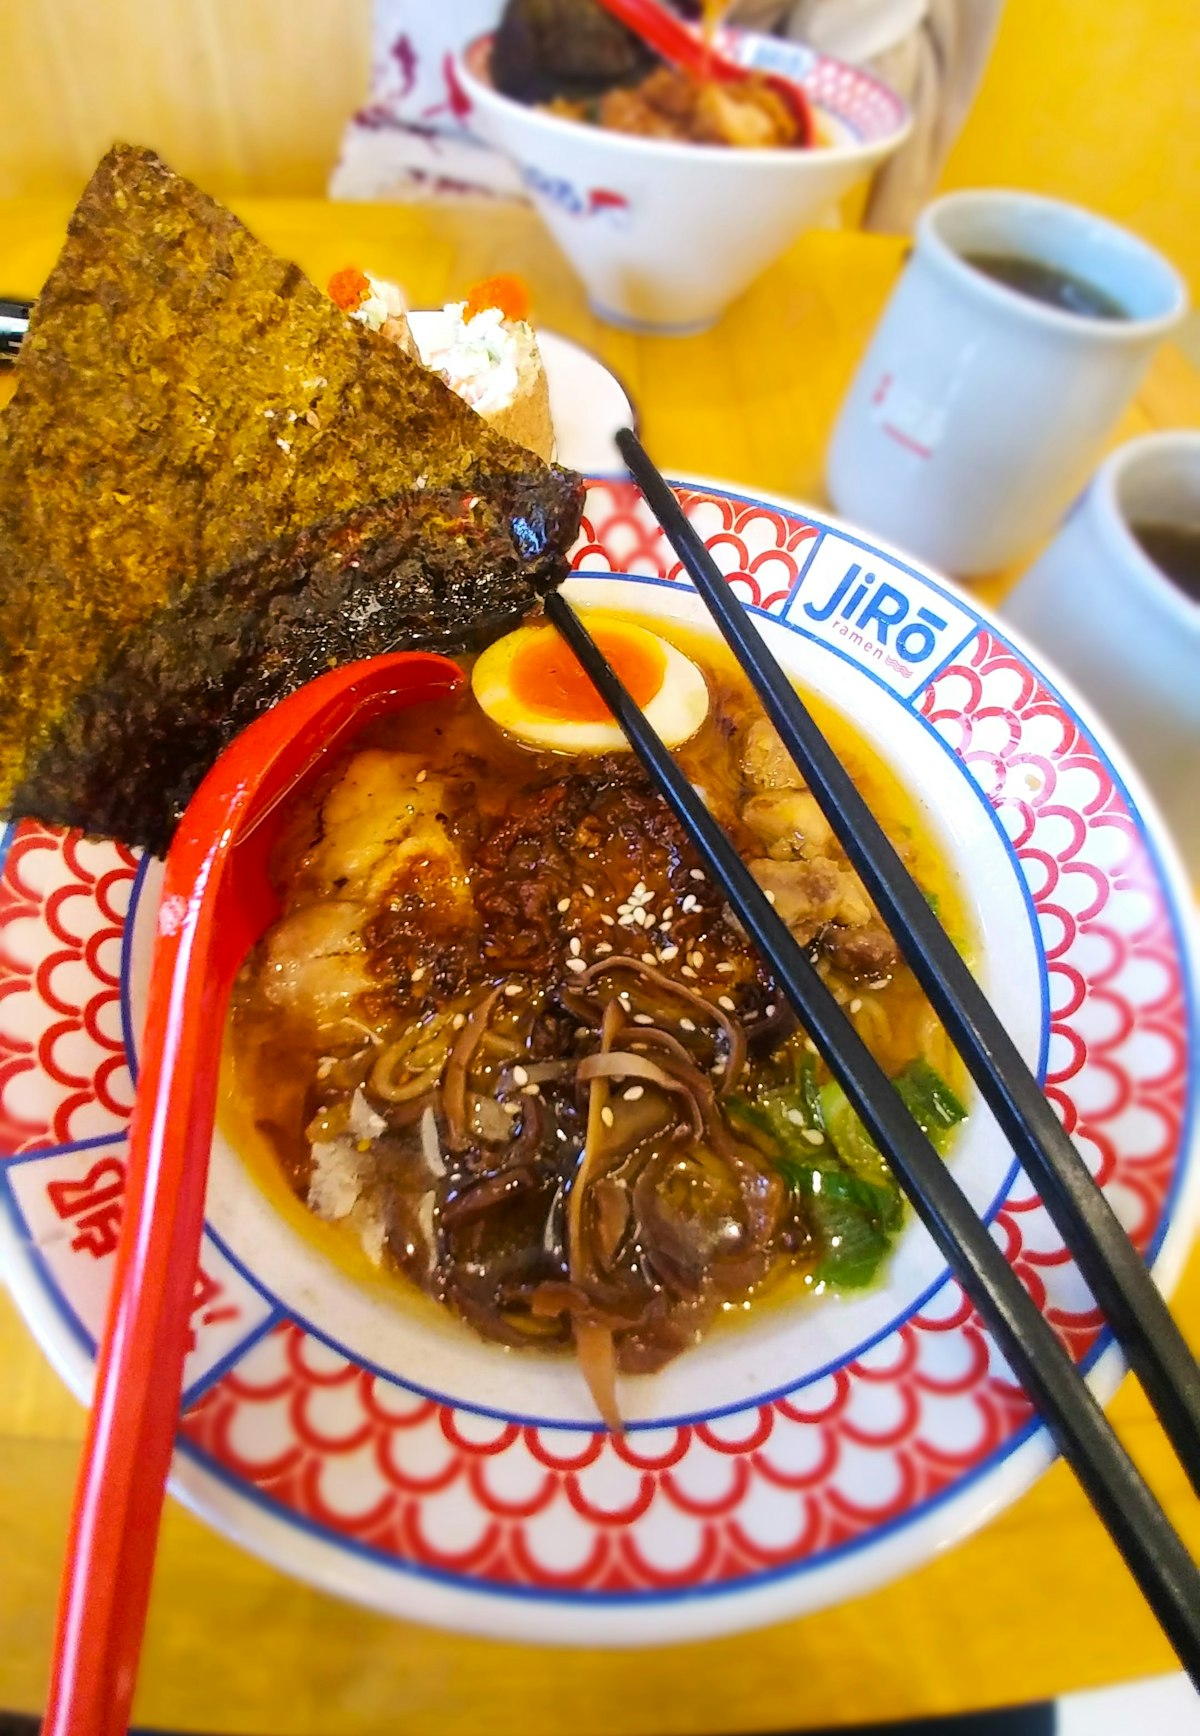
- Arrange toppings. Fan the chashu slices on one side. Place the halved egg next to the pork. Add nori sheets standing upright, leaning against the side of the bowl. Scatter scallions, menma, corn, and sesame seeds in their own sections. The visual presentation is part of the ramen experience.
- Serve immediately. Ramen waits for no one. The noodles continue absorbing broth and the toppings cool quickly. Serve the moment assembly is complete and eat promptly.
Recipe Card: Complete Tonkotsu Shoyu Ramen
Prep time: 5 hours (spread over 2 days) | Cook time: 18 hours (mostly unattended) | Servings: 4 large bowls
Cuisine: Japanese | Course: Main course | Calories: approximately 780 per serving
Nutrition Information (per serving, approximate)
| Nutrient | Amount | % Daily Value |
|---|---|---|
| Calories | 780 kcal | 39% |
| Total Fat | 38 g | 49% |
| Saturated Fat | 14 g | 70% |
| Cholesterol | 245 mg | 82% |
| Sodium | 1,890 mg | 82% |
| Total Carbohydrates | 62 g | 23% |
| Dietary Fiber | 3 g | 11% |
| Protein | 42 g | 84% |
| Iron | 4.2 mg | 23% |
Nutritional data estimated based on USDA FoodData Central values for individual ingredients. Actual values may vary based on specific brands and preparation methods.
Ramen Variations: Adapting the Base Recipe
Once you have mastered the tonkotsu shoyu bowl above, the framework adapts easily to other styles. For miso ramen, replace the shoyu tare with a blend of 2 tablespoons red miso, 1 tablespoon white miso, 1 tablespoon sake, and 1 teaspoon sesame oil per bowl. For shio (salt) ramen, use a lighter chicken-based chintan broth and a tare of sea salt dissolved in dashi with a touch of yuzu juice. For tsukemen (dipping noodles), serve the noodles cold on a separate plate with a more concentrated, thicker broth in a smaller bowl for dipping. The key is to learn to see each component as an independent module that you can swap and customize. If you enjoy exploring global flavor combinations, you might also appreciate our guide on combining international flavors in one dish.
Storage, Reheating, and Make-Ahead Tips
Ramen is best assembled fresh, but every component can be prepared in advance. The tonkotsu broth freezes beautifully for up to 3 months; thaw and reheat gently. Tare keeps refrigerated for a month. Chashu stores in its braising liquid for up to 5 days refrigerated. Marinated eggs keep for 3 days (the yolk firms up further beyond 24 hours, so pull them from the marinade after a day if you prefer a jammier center). Noodles can be made up to 2 days ahead and stored in portioned nests dusted with starch in sealed bags in the refrigerator.
When reheating broth, bring it to a full boil and whisk vigorously to re-emulsify any fat that has separated during storage. The broth should return to its original creamy consistency within a minute of vigorous whisking at a boil.
Frequently Asked Questions About Homemade Ramen
Why does my tonkotsu broth not turn white and creamy?
The most common reason is insufficient boiling intensity. Tonkotsu requires a sustained, vigorous rolling boil, not a gentle simmer. The aggressive bubbling action is what emulsifies the fat into the broth and breaks down collagen into gelatin, creating the characteristic opaque, creamy texture. Also ensure you are using enough bones with collagen-rich joints (trotters, knuckles) and cooking for at least 12 hours.
Can I make ramen noodles without a pasta machine?
Yes, though it requires significant effort. Roll the dough as thin as possible with a rolling pin (aim for 1.5 to 2 mm), fold it in thirds, and cut into thin strips with a sharp knife. The texture will be slightly less uniform than machine-rolled noodles, but the flavor and chew from the alkaline water will still be authentic. A heavy rolling pin and patience are your best tools.
How do I adjust the richness of the broth?
For a lighter bowl, dilute the tonkotsu broth with chicken stock or dashi at a ratio of 2:1 or 3:1. For maximum richness, reduce the strained tonkotsu broth by simmering uncovered for an additional 30 to 60 minutes after straining. You can also add a tablespoon of tahini or sesame paste to each bowl for extra creaminess, a technique used in some regional ramen styles.
What is the best substitute for kansui in ramen noodles?
Baked baking soda is the most accessible and effective substitute. Spread regular baking soda on a baking sheet and bake at 120 degrees Celsius for one hour. The resulting sodium carbonate has a much higher pH than baking soda and produces noodles with the same springy texture and yellow color as traditional kansui. Use approximately 1.5% of the flour weight.
Disclaimer: Nutritional information provided in this article is approximate and intended for general reference only. Values may vary depending on specific ingredients, brands, and preparation methods used. This content is not a substitute for professional nutritional advice. Individuals with dietary restrictions, allergies, or specific health conditions should consult a qualified healthcare professional before making significant changes to their diet.